Boot from USB Ubuntu: Create a Bootable Ubuntu USB with Persistence. The following segment covers how to use YUMI as an Ubuntu bootable USB media creator tool from within Windows or in Linux via WINE. Once finished, you should be able to successfully boot from the Live USB. You can also use the removable device to install Ubuntu to a hard drive.
Bootable Ubuntu USB

- Distribution Home Page: Ubuntu Project Page
- Developer: Founded by Mark Shuttleworth (Canonical Ltd)
- Distribution Release Date: First released October 20, 2004
- Persistent Feature: Yes (writable or casper-rw persistence)
What is Ubuntu Linux?
Ubuntu is a very popular open-source operating system (OS) based on the Linux kernel, developed and maintained by Canonical Ltd. It is designed to be user-friendly, secure, and versatile, making it suitable for a wide range of computing needs, from personal desktops to servers and cloud environments.
It was originally based on Debian Linux. Over time, Ubuntu has evolved into one of the most well-known Linux distributions, widely loved by its users.
Key features include:
- Open Source Operating System: Distributed under an open-source license, allowing users to modify, distribute, and contribute to its development.
- Debian-Based: Inherits the stability of Debian while adding its own features, improvements, and user-friendly interfaces.
- Live Desktop and Server Editions: Available in two main editions; Live Desktop (for personal/business use) and Server (designed for server environments without a GUI).
- Unity and GNOME Desktop Environments: Unity was used until 2017, after which Ubuntu switched back to the GNOME desktop environment.
- Software Center: Simplifies the installation and management of applications, allowing users to search and install both free and proprietary software.
- Package Management: Ubuntu uses the Debian package management system, with APT as the primary tool for installing and updating software.
- Security: Known for its robust security, it benefits from the Linux security model with regular security updates.
- Community Support: A large and active community contributes to troubleshooting, knowledge sharing, and continuous development.
- LTS Releases: Long-Term Support releases provide security and updates for five years, ensuring stability.
- Cloud Integration: Ubuntu is widely used for cloud computing, supporting major platforms like AWS, Microsoft Azure, and Google Cloud Platform.
Essentials to Boot from USB Ubuntu
- Windows 11, 10, 8, 7 (or Linux using dd or WINE on Ubuntu)
- Ubuntu Live ISO file
- Fast SSD USB flash drive
- YUMI Multiboot USB media creator tool or using DD from Linux
How to Create a Bootable USB Ubuntu with Persistence
There are several ways to create a bootable USB Ubuntu. This section covers using the YUMI software, which utilizes the casper-rw persistence feature. This allows you to store configuration changes and restore them on subsequent boots using a persistent overlay image or block file.
Make a Bootable USB Ubuntu using YUMI
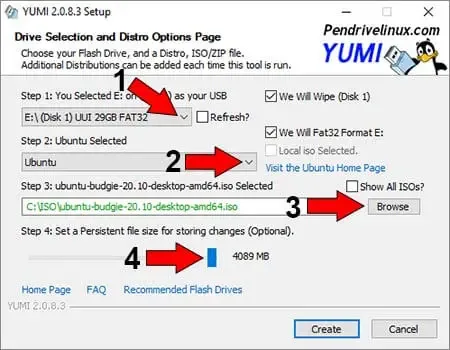
Here’s how to use YUMI software from within Windows or from Linux via WINE to create a bootable USB Ubuntu:
- Download and launch YUMI
- Select your thumb drive from the dropdown list.
- Choose Ubuntu as the distribution.
- Browse to and select your ISO file.
- Optionally, set the "persistent file" size to store changes, then click Create.

- Once the YUMI script has finished, restart your PC.
Make a Bootable Ubuntu USB from Linux
If you prefer using the dd command in Linux, here’s how you can create a bootable Ubuntu USB. This method is great for those comfortable with terminal commands, and it also allows you to add persistence using a separate partition.
How to Create an Ubuntu Bootable USB using dd
- Prepare the USB Drive: Insert your USB drive and use a tool like
lsblkorfdisk -lto identify the device name (e.g.,/dev/sdX, whereXis your USB drive letter).
Warning: Usingddwill overwrite all data on the selected drive.lsblk - Download an Ubuntu ISO: Download Ubuntu from the official site.
- Create a Persistent Partition (Optional but recommended): For persistence, create two partitions on the USB: one for the Ubuntu system (ext4) and one for persistence (e.g.,
casper-rw)./dev/sdX1(ext4) for the Ubuntu system/dev/sdX2(ext4) for persistence (casper-rw)
- Write the Ubuntu ISO to the USB with dd: Use the
ddcommand to copy the Ubuntu ISO to the USB. Replace/dev/sdXwith your actual USB path andubuntu.isowith the path to the ISO.sudo dd if=ubuntu.iso of=/dev/sdX bs=4M status=progress && sync - Create the Persistence File: If you’ve created a partition for persistence, mount it and create the
casper-rwfile.sudo mkdir /media/usbsudo mount /dev/sdX2 /media/usb # Assuming the second partition is for persistence
Set BIOS to Boot Ubuntu from USB
To boot from the Ubuntu USB drive:
- During startup, press the appropriate key (F1, F2, F10, F12, Del, etc.) to enter BIOS setup. Learn more about accessing BIOS.
- Use the arrow keys to set the first boot device to your USB drive.
- Save changes and reboot.
Once the system reboots, you should be able to boot from the Ubuntu Live USB.
Install Ubuntu from USB
You can also use the bootable Ubuntu USB to install Ubuntu onto an internal hard drive or another storage device.

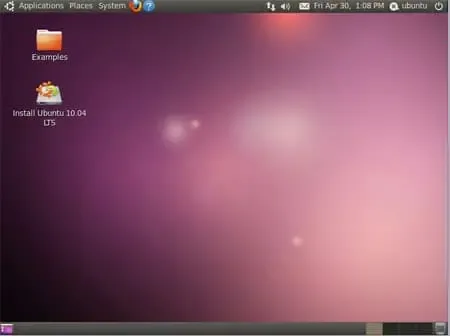
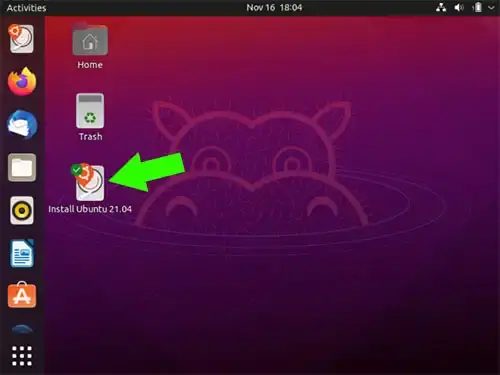
Once booted, click the installer shortcut on the desktop to begin installing Ubuntu from the USB drive to another device.
