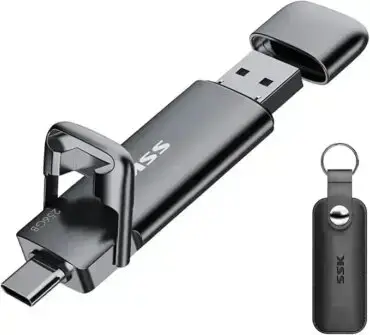
How to Share Files Between Ubuntu Live and Windows Using a USB Drive. Want to transfer files between Ubuntu and Windows using the same bootable USB drive? An easy solution is to store shared files on a writable USB filesystem such as exFAT or NTFS. Modern versions of Ubuntu can access files on USB storage during a live session, while Windows can read common filesystems such as exFAT and NTFS.
A bootable Ubuntu USB does not need to be modified just to share files. The Ubuntu live system is designed around read only boot media, while a writable filesystem or separate data partition can provide convenient storage for documents, photos, videos, backups, ISO files, and other data.
For older Ubuntu releases, there was also a casper based technique that modified the live system's boot files to make the USB media writable in a different way. That method is preserved later in this guide as a legacy technique for older Ubuntu installations and historical reference.
Sharing Files Between Ubuntu and Windows on a USB

How to Share Files Between Ubuntu Live and Windows
The most reliable approach is to give the USB drive a filesystem that both operating systems can access.
For a dedicated shared-data area, exFAT is an excellent choice because it supports large files and works with modern Windows and Linux systems. NTFS is another good option, particularly when the USB drive will be used primarily with Windows.
FAT32 also works, but its 4 GB maximum file size makes it less convenient for large ISO images, videos, backups, and disk images.
Ubuntu's live environment can access files on USB devices, so you can boot Ubuntu from the USB drive and use another writable filesystem or partition for shared data.
What This Setup Allows
- Boot Ubuntu from a USB flash drive.
- Access a shared data area from the Ubuntu live session.
- Save documents, photos, videos, backups, and other files.
- Remove the USB drive and access the same files from Windows.
- Use the USB drive for both portable Linux tools and general file storage.
Recommended USB Filesystems for Windows and Ubuntu
| Filesystem | Windows | Ubuntu | Best Use |
|---|---|---|---|
| exFAT | Yes | Yes | Shared files and large files |
| NTFS | Yes | Yes | Windows-focused storage and large files |
| FAT32 | Yes | Yes | Maximum compatibility and boot-related storage |
| ext4 | Not natively | Yes | Linux-only storage |
For a USB drive that will regularly move between Windows and Ubuntu, exFAT is generally the simplest choice. FAT32 remains useful when compatibility with older systems or boot tools is important, but its 4 GB maximum file size can be restrictive.
Option 1: Use a Separate Shared Data Partition
If your bootable USB supports multiple partitions, one of the cleanest arrangements is to keep the Ubuntu boot environment separate from a shared data area.
A typical layout might look like this:
USB Drive
├── Ubuntu boot/live files
└── Shared Data (exFAT or NTFS)
    ├── Documents
    ├── Downloads
    ├── Photos
    ├── Videos
    └── Backup
Ubuntu can mount the shared partition when the live session starts, while Windows can access the same partition when the USB is connected to a Windows computer.
Important: Windows support for multiple partitions on removable USB media can vary by Windows version and configuration. If Windows needs to access the shared data area reliably, the partition layout and USB creation method matter. A bootable USB tool that deliberately creates a Windows-accessible data area can be preferable to manually repartitioning an existing boot drive.
Option 2: Use a USB Drive With a Shared Data Area
If your goal is simply to carry files between computers, you do not necessarily need Ubuntu's live system and shared data to occupy the same filesystem.
A simple setup is:
- Create your Ubuntu bootable USB using your preferred USB creation tool.
- Use a writable USB partition or separate USB storage device for shared files.
- Format the shared storage as exFAT or NTFS.
- Boot Ubuntu from the USB drive.
- Open the file manager and mount the shared storage.
- Copy files to or from the shared storage.
- Boot Windows and access the same files from the USB drive.
This approach avoids modifying Ubuntu's live boot files and is much easier to maintain when Ubuntu is updated.
Option 3: Use Persistence When You Need Ubuntu to Save Changes
There is an important difference between sharing files and Ubuntu persistence. A shared data partition is intended for files that need to be accessed by multiple operating systems. Persistence is intended to save changes made to the Ubuntu live environment, such as installed software, settings, and files that belong to the persistent live session.
In short:
- Need files shared with Windows? Use exFAT or NTFS.
- Need Ubuntu settings and changes to survive a reboot? Use persistence.
- Need both? Use a persistent live setup with a separate shared data area when your USB creation method supports it.
Why the Ubuntu Live USB Is Read Only
A common source of confusion is that Ubuntu's live system is not simply a normal Ubuntu installation copied to a flash drive.
The live system normally boots from a read only filesystem containing the compressed Ubuntu system image. The casper boot system then creates a writable environment using an overlay. The underlying live media remains read only while changes can be handled by the writable layer.
This design allows Ubuntu to boot consistently from installation media without modifying the operating system image stored on the USB.
It does not, however, mean that Ubuntu cannot write to USB storage.
If another writable filesystem is available, Ubuntu can mount it and use it like normal storage.
Access Shared USB Files From Ubuntu
After booting Ubuntu from the USB drive:
- Connect the USB drive containing the shared data area.
- Open Files.
- Look for the USB device in the sidebar.
- Click the partition you want to access.
- Copy or move files as needed.
Ubuntu's live environment can access files stored on USB devices without requiring changes to the live boot image. If the filesystem does not automatically appear, you can identify and mount it manually using standard Linux storage tools.
Access the Same Files From Windows
After shutting down Ubuntu:
- Remove the USB drive only after Ubuntu has completely shut down.
- Connect the USB drive to Windows.
- Open File Explorer.
- Locate the shared USB volume.
- Open, copy, move, or back up your files.
For the simplest cross-platform experience, use a filesystem supported by both operating systems, such as exFAT.
Important: Do Not Store Shared Files in the Live System Overlay
Files saved inside the live Ubuntu environment are not necessarily stored directly on the physical USB filesystem.
This distinction is especially important when persistence is enabled.
If you want a document, photo, ISO, or backup to be available from Windows, save it to the shared data filesystem, not simply somewhere inside Ubuntu's live session.
Think of it this way:
Ubuntu Live Environment
        |
        +-- System files / overlay
        |      Linux-focused
        |
        +-- Shared USB Data
               |
               +-- Windows
               +-- Ubuntu
The shared data area is the common meeting point between the two operating systems.
Legacy Method: Modify Casper for Writable Live USB Access
Important: The following procedure is preserved for historical reference and older Ubuntu releases. It is not the recommended method for current Ubuntu releases.
Older Ubuntu live media used a different boot structure, including files such as initrd.lz, Syslinux configuration files, and older versions of the casper script.
The original technique modified the compressed initramfs and changed how the live media was mounted so that the live user could write directly to the USB filesystem.
This method was useful with older Ubuntu releases, including versions such as Ubuntu 10.04, 10.10, 11.04, and 11.10.
Modern Ubuntu live systems use newer boot and persistence mechanisms, so the old instructions should not be applied blindly to current Ubuntu ISOs.
What the Original Casper Modification Did
The historical method modified initrd.lz and the casper script to change the mount options used during boot.
The original procedure involved:
- Extracting
/cdrom/casper/initrd.lz - Editing
scripts/casper - Adding a configurable mount mode
- Changing the mount command used by
casper - Rebuilding the initramfs
- Replacing the original
initrd.lz - Changing the Syslinux boot configuration
This was a specialized modification to the live boot system rather than a general-purpose file-sharing feature.
Original Legacy Casper Procedure
Use this section only when working with an old Ubuntu live image that matches the procedure.
- Boot Ubuntu from the older USB flash drive.
- Open a terminal and gain root privileges:
sudo su - Create and navigate to a working directory:
mkdir /projectaccess
cd /projectaccess - Extract the old
initrd.lzarchive:
lzma -dc -S .lz /cdrom/casper/initrd.lz | cpio -id - Edit the casper script:
gedit scripts/casper - Find:
home_snapshot_label="home-sn" - Immediately below it, add:
mountmode="ro, noatime" - Depending on the old Ubuntu version, locate the appropriate section:
- Ubuntu 10.04 or 10.10:
IGNORE_UUID="Yes" ;; - Ubuntu 11.04 or 11.10:
UUID="" ;;
- Ubuntu 10.04 or 10.10:
- Immediately underneath, add:
basemountmode=*)

mountmode="${x#basemountmode=}";; - Find:
if is_supported_fs ${fstype}; then - Modify the corresponding mount command to:
mount -t ${fstype} -o ${mountmode} "${devname}" $mountpoint || continue - Save the changes.
- Rebuild the old initramfs:
find . | cpio -o -H newc | gzip -9 > initrd.lz - Copy the modified file back to the USB:
cp initrd.lz /cdrom/casper - Edit the old Syslinux configuration:
gedit /cdrom/syslinux/txt.cfg - Locate the appropriate
appendline and change:
initrd=/casper/initrd.lz
to:
initrd=/casper/initrd.lz basemountmode=ro, noatime, uid=999, gid=999 - On some very old Ubuntu releases, the configuration file may instead be named
text.cfg. - Save the configuration.
- Reboot and test the modified live USB.
Warning: This procedure changes the Ubuntu live boot image itself. Keep a backup of the original ISO or USB contents before experimenting, and do not assume the commands will work with a modern Ubuntu ISO.
Casper, Persistence, and Shared Storage: What's the Difference?
| Feature | Purpose | Windows Access |
|---|---|---|
| Live Ubuntu | Run Ubuntu without installing it | Not the main purpose |
| Shared exFAT/NTFS storage | Exchange files between systems | Yes |
| Persistence | Save Ubuntu changes between boots | Usually not directly |
| Legacy casper modification | Alter how older live media is mounted | Depends on the filesystem and setup |
Troubleshooting Ubuntu and Windows USB File Sharing
Ubuntu Can Read the USB but Cannot Save Files
Make sure you are writing to a writable data filesystem rather than the read only live system filesystem.
If the shared partition is mounted read only, check its filesystem and mount status.
Windows Cannot See the Shared Partition
The partition layout may be the issue rather than the filesystem itself.
Some Windows configurations have historically handled multiple partitions on removable USB drives differently. If Windows must access the data partition, use a USB creation method designed to provide a Windows-accessible data area.
Should I Use FAT32?
FAT32 is widely compatible, but it has a 4 GB maximum file size.
For modern file sharing, exFAT is usually a better choice when you need to store large files.
Can I Use NTFS Instead of exFAT?
Yes. NTFS is a practical choice when the drive will primarily be used with Windows and Ubuntu.
For a simple cross-platform USB data area, exFAT is often more convenient.
Why Doesn't the Old Casper Method Work on My New Ubuntu ISO?
The old instructions were written for Ubuntu live media that used an older boot structure. Current Ubuntu releases use newer versions of the live boot system and different casper-persistence mechanisms.
The initrd.lz, Syslinux configuration, and script locations described in the legacy procedure should therefore not be assumed to exist on current Ubuntu media.
Do I Need Persistence to Share Files With Windows?
No.
Persistence and file sharing solve different problems.
If you simply need files to move between Ubuntu and Windows, use a writable filesystem such as exFAT or NTFS.
If you need Ubuntu itself to remember installed applications, settings, and changes after rebooting, use a supported persistent-live configuration.
Can I Use a Multiboot USB for File Sharing?
Yes. A multiboot USB can include a shared data area in addition to its boot files and operating system images.
This can be particularly useful with tools such as YUMI exFAT, where the USB can serve as both a multiboot device and a general-purpose storage drive.
Frequently Asked Questions
Can I share files between Ubuntu and Windows using the same USB drive?
Yes. The simplest modern approach is to use a writable USB filesystem such as exFAT or NTFS for the files you want to share. Ubuntu can access the USB storage from a live session, while Windows can access files stored on compatible filesystems.
Can Ubuntu Live save files to a USB drive?
Yes. Ubuntu can read and write to a writable USB filesystem. The important distinction is that the live Ubuntu system itself normally uses read only live media with a writable overlay, while a separate writable data filesystem can be used for ordinary file storage.
What is the best filesystem for sharing files between Ubuntu and Windows?
For most modern USB file-sharing situations, exFAT is a strong choice because it supports large files and works with both Windows and Linux. NTFS is also a good option, particularly for Windows-focused storage.
Do I need to modify casper to share files between Ubuntu and Windows?
No. Modifying casper is an older technique intended for specific Ubuntu live environments. For current systems, using a shared exFAT or NTFS filesystem is normally a simpler and safer solution.
Do I need persistence to share files with Windows?
No. Persistence and file sharing solve different problems. If you simply need files to move between Ubuntu and Windows, use a writable filesystem such as exFAT or NTFS. Persistence is useful when you need Ubuntu itself to remember settings, installed software, and other changes between live sessions.
Can I use a multiboot USB for file sharing?
Yes. A multiboot USB can include a shared data area in addition to its boot files and operating system images. This can be particularly useful with tools such as YUMI exFAT.
Final Thoughts on Sharing Files Between Ubuntu and Windows
A bootable Ubuntu USB does not have to be limited to running Linux.
With a properly configured writable data area, the same USB drive can boot Ubuntu, store files, and transfer data between Ubuntu and Windows.
For modern systems, the best approach is usually to keep the Ubuntu live environment separate from the files you want to share. An exFAT or NTFS data area provides a straightforward place for documents, photos, videos, backups, ISO images, and other files that need to move between operating systems.
The old casper modification remains useful as a historical technique for older Ubuntu releases, but it should not be the first solution for current Ubuntu installations.
Bonus Tip: If you want a USB drive that can boot multiple Linux distributions while also providing a convenient shared storage area, see YUMI exFAT.