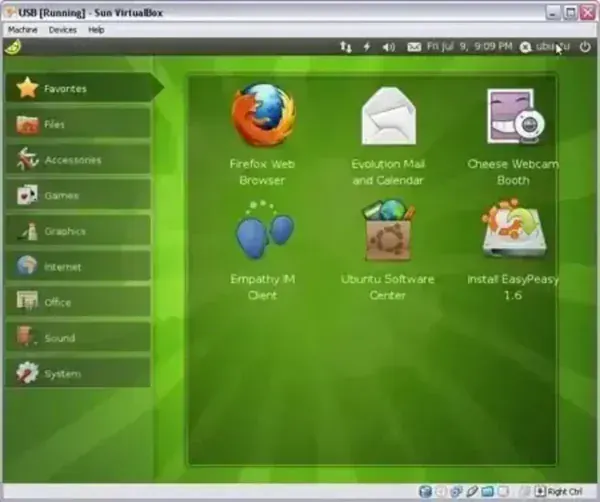
How to Install Easy Peasy to USB flash drive using Windows, Linux or macOS. EasyPeasy is a remix for Netbooks that is based on Ubuntu. It is a Linux Live portable operating system specifically designed and optimized for use on low resource netbooks.
USB Bootable Easy Peasy

- Distribution Home Page: Sourceforge Project Page
- Developer: Founded by Jon Ramvi
- Persistent Feature: Yes
What is Easy Peasy?
Easy Peasy or EasyPeasy is a Linux distribution that was designed for netbooks and other low spec devices. It is based upon Ubuntu and features a simplified user interface, making it easy for beginners to use. This Netbook Operating System offers applications such as Skype, Transmission BitTorrent Client, Pidgin Messenger, Evolution Email, Open Office, and Firefox with Flash, Java and other codecs already installed.
Prerequisites
- EasyPeasy ISO file
- USB flash drive (4GB minimum, 8GB+ recommended for persistence)
🪟 How to Create a Bootable USB in Windows
If you're using a Windows based system, the easiest way to create a bootable Easy Peasy USB drive is by using YUMI, a flexible multiboot USB boot creator. This method also allows for optional persistence so your changes can be saved between sessions.
Using YUMI (Your Universal Multiboot Installer)
- OS: Windows 11, 10, 8, or 7
- Tool: YUMI
- Download the EasyPeasy ISO
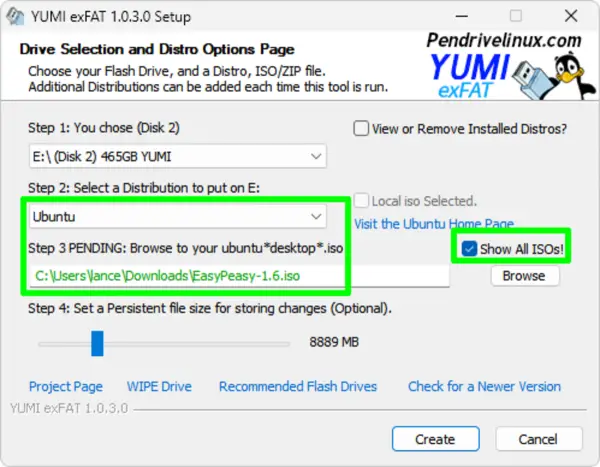
- Download and launch YUMI
- (1.) Select your USB drive.
- (2.) Choose Ubuntu. Tick the box to Show All ISOs (we're going to force Easy Peasy)
- (3.) Browse to and select your EasyPeasy ISO file.
- (4.) Optional - Set a persistent storage size.
- (5.) Click Create.
- Once the script has finished, reboot, and set your BIOS/UEFI to boot from your USB flash drive.

🐧 How to Create a Bootable USB in Linux
Linux users can create a bootable USB using the terminal and the dd command. This is a simple and fast method, though it does not include persistence out of the box. Be sure to back up your USB drive before proceeding as all content will be overwritten.
Using the Terminal and dd
- Insert your USB drive and identify it:
lsblk - Unmount the USB:
sudo umount /dev/sdX* - Burn the ISO to the drive.
(replace Downloads with the path to your ISO and x with your actual device letter found in step 1):sudo dd if=~/Downloads/easypeasy.iso of=/dev/sdX bs=4M status=progress && sync - Once finished, reboot and select USB boot from BIOS/UEFI.
🍎 How to Create a Bootable USB in macOS
On macOS, the dd command can also be used from the Terminal to write the ISO to a USB flash drive. While this method is straightforward, note that persistence is not supported when using this approach. Again be sure to backup your drive before proceeding as all content on the drive will be lost.
Using Terminal and dd
- Insert your USB drive and check its device ID:
diskutil list - Unmount the USB drive:
diskutil unmountDisk /dev/diskX - Write the ISO to USB:
sudo dd if=~/Downloads/easypeasy.iso of=/dev/rdiskX bs=1m - Wait for it to finish (no output until complete), then eject:
diskutil eject /dev/diskX - Reboot your Mac while holding the Option key and select the USB drive.
Conclusion
If all goes well, you should now have a bootable Easy Peasy USB flash drive ready to use. Persistence is available when using the Windows YUMI method. Keep in mind, this Live portable Linux distribution was specifically built for netbooks and may not function as well on standard desktops or modern laptops. For best results, run it on low specification hardware as originally intended.
