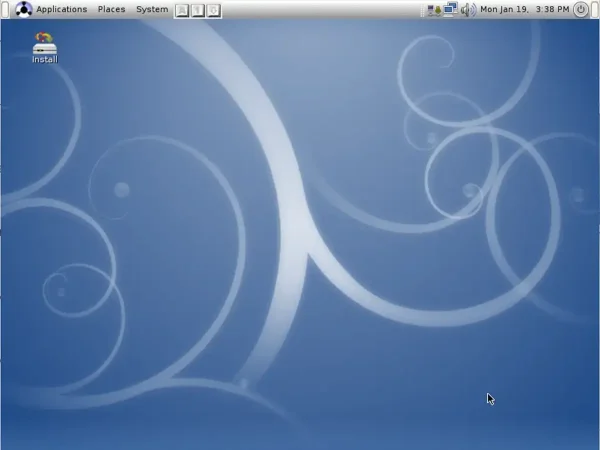
This tutorial will guide you through the steps to create a bootable USB drive with Eeebuntu, a lightweight Linux distribution originally tailored for Asus EeePC netbooks. With persistence enabled, your portable operating system can save files, settings, and system changes between reboots, turning a basic flash drive into a powerful on the go portable Linux workstation.
What Is Eeebuntu?

Eeebuntu (formerly Easy Peasy Ubuntu) is a stripped down version of Ubuntu optimized for low-powered netbooks like the Asus EeePC. While no longer under active development, it remains useful for older hardware due to its lightweight footprint and familiar interface.
Key Features
- Low System Requirements: Ideal for aging netbooks or devices with limited resources.
- Netbook Optimized: Includes pre configured drivers and settings for better hardware compatibility.
- Ubuntu Based Interface: Offers a similar experience for those familiar with Ubuntu.
- Live + Persistent Support: Capable of saving files and settings between boots if persistence is enabled.
Note: Eeebuntu is no longer an officially supported or updated Linux variant.
What You'll Need
- A 2GB or larger USB flash drive (4GB+ recommended)
- The Eeebuntu ISO file
- Access to a Windows, macOS, or Linux machine
- An internet connection
Creating a Bootable Eeebuntu USB Drive (Windows)
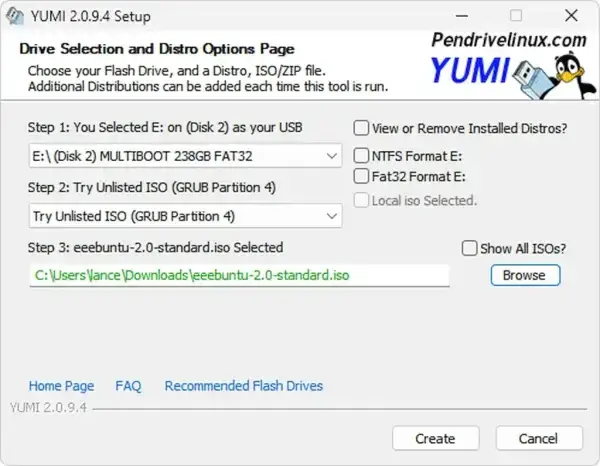
Note: This method utilizes the old YUMI Legacy bootable USB creation tool (using Grub Partition 4). The modern exFAT version of YUMI will not work here.
- Download the eeebuntu.iso file
- Download and launch YUMI Legacy
- Insert your USB flash drive and select it from the list.
- Choose "Try Unlisted ISO (GRUB Partition 4)
- Browse for the ISO file and then click "Create" and wait for the process to finish.
- Restart your PC and boot from the USB (set boot order in BIOS/UEFI).

If you'd like, you can create a persistence file for saving changes by using the Casper-RW file creator.
Creating a Bootable Eeebuntu USB Drive (Linux)
Linux users can use dd, mkusb, or Ventoy to create bootable USB drives. For persistence, mkusb is recommended.
Using mkusb (Recommended for Persistence)
- Install mkusb (Ubuntu/Debian):
sudo add-apt-repository ppa:mkusb/ppa && sudo apt update && sudo apt install mkusb - Launch mkusb with:
sudo mkusb - Select the Eeebuntu ISO when prompted.
- Choose the correct USB device and set the persistence file size.
- Complete the process and reboot from USB.
Using dd (No Persistence)
- Insert USB and identify device name with:
lsblk - Use
ddto write the ISO:sudo dd if=eeebuntu.iso of=/dev/sdX bs=4M status=progress oflag=syncReplace
/dev/sdXwith your USB drive path. - Boot your machine from the USB to launch Eeebuntu.
Creating a Bootable Eeebuntu USB Drive (macOS)
On macOS, you can create a bootable USB with Etcher or the dd command. Persistence is more complex on macOS and may require using a Linux machine to set up that feature.
Using Etcher (Simple, No Persistence)
- Download and install Etcher.
- Insert your USB flash drive.
- Select the Eeebuntu ISO and your USB device.
- Click "Flash" to write the ISO.
- Reboot your Mac (if supported) or another machine and boot from the USB.
Using Terminal (Advanced)
- Convert the ISO to IMG:
hdiutil convert -format UDRW -o eeebuntu.img eeebuntu.iso - Identify your USB device:
diskutil list - Unmount the USB:
diskutil unmountDisk /dev/diskN - Write the image:
sudo dd if=eeebuntu.img.dmg of=/dev/rdiskN bs=1m - Replace
diskNwith your actual USB disk number.
Note: Persistence is not officially supported using dd or Etcher on macOS. Consider preparing the persistent USB on Linux or Windows.
Why Use Eeebuntu on USB?
- Boot a full Linux OS without installing anything on your hard drive.
- Retain personal files and system changes across sessions with persistence enabled.
- Ideal for testing, troubleshooting, or reviving older laptops.
Troubleshooting Tips
- Ensure your BIOS/boot menu is set to boot from USB first.
- Make sure your USB is formatted correctly (FAT32 or EXT4 depending on tool).
- If persistence fails, verify that it was enabled and that sufficient space was reserved.
Frequently Asked Questions (FAQ)
What is the difference between persistent and non-persistent USB drives?
A persistent USB can retain system changes, installed apps, and personal data between reboots. A non-persistent (Live) USB resets everything each time you boot.
Can Eeebuntu be used on devices other than the Asus EeePC?
Yes, it can run on other compatible netbooks or older laptops, though hardware support is optimized for the EeePC line.
Why won't Eeebuntu boot from my USB drive?
Make sure your BIOS or boot menu is configured to boot from USB first. Also, verify that the USB was created correctly and formatted as FAT32.
Is Eeebuntu still supported?
No. Eeebuntu is no longer maintained or updated. However, it can still function well on older devices, though security updates and support are unavailable.
Final Thoughts
Creating a bootable Eeebuntu USB drive with persistence is a great way to breathe new life into aging netbooks or run a secure Linux system without modifying your main computer. While development has ceased, it remains a functional, minimalist Linux distribution for lightweight computing needs.
Looking for a more current alternative? You might explore other portable Linux distros that support persistence and are actively maintained.
