GalliumOS is a lightweight Linux distribution originally designed for Chromebooks and Chromeboxes, with Chromebook-specific kernel and hardware tweaks. However, the project has been discontinued: its final official release, GalliumOS 3.1, dates to December 22, 2019. The project wiki warns that its outdated kernel and lack of security fixes make it unsuitable for most users today. Treat this guide as a historical compatibility and booting reference, not a recommendation to install GalliumOS for everyday internet-connected use. Check your Chromebook model and current firmware options before attempting another operating system.
Is GalliumOS Still a Good Linux Choice for Chromebooks?
In this guide, we cover why this Linux distribution is so well fit for Chromebooks and walk you through the steps to make GalliumOS boot from USB.
Important Note About Modern Chromebooks
GalliumOS is best suited for older Chromebooks and Chromeboxes that support legacy boot mode. Many newer Chromebooks no longer allow booting a full Linux OS from USB. If you're using a modern Chromebook and simply want to run Linux applications without replacing ChromeOS, Google's built in Linux development environment (Crostini) may be a better option.
Why Choose GalliumOS for Chromebooks?
GalliumOS stands out because it was built with Chromebooks in mind. Here are some key reasons to consider it:
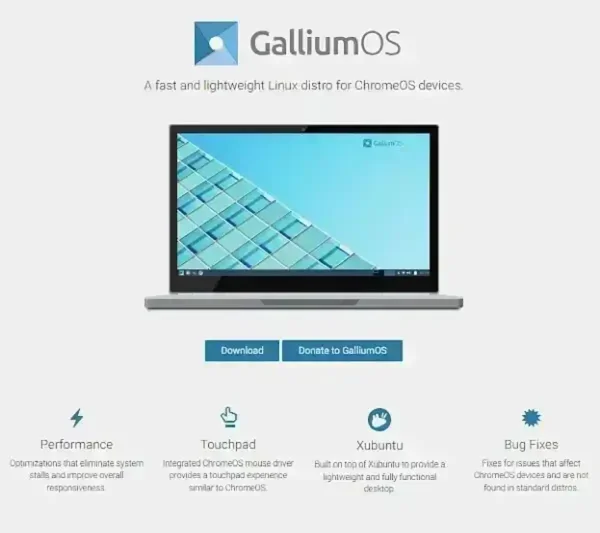
- Performance Optimization: It's designed to be lightweight, ensuring your Chromebook's limited hardware resources (like CPU and RAM) are utilized efficiently.
- Hardware Compatibility: It comes with pre-installed drivers and tweaks to ensure compatibility with Chromebook hardware, including touchpads, keyboards, and Wi-Fi cards.
- Battery Efficiency: Unlike many other Linux distributions, it minimizes unnecessary background processes, optimizing power usage for extended battery life.
- Fast Boot Times: Leveraging its lightweight Xubuntu base, this Linux distro boots very quickly, even on older Chromebook models.
- Customization: It offers the flexibility of a full fledged Linux system with access to countless open source applications and tools.
Whether you want to extend the life of an older Chromebook or need a versatile operating system for development or everyday use, this Linux distribution makes for an excellent choice.
Key Features of GalliumOS
GalliumOS offers a range of features that enhance the Chromebook experience, making it stand out among other Linux distributions:
- Optimized for Chromebooks: Custom kernel and patches make it perfectly tailored for the unique hardware in Chromebooks.
- Cross Application Compatibility: Being based on Xubuntu (Ubuntu), it's compatible with a huge range of Linux software, including popular apps like Firefox, LibreOffice, and GIMP. It also supports Snap packages, providing access to thousands of additional applications.
- Dual Boot Support: Can be set up alongside ChromeOS, allowing you to switch between the two operating systems as needed.
- Secure: As a purely Linux based system, GalliumOS inherits the security features of Linux, making it a safer alternative to ChromeOS for those looking for more control.
- Extensive Documentation: Is well documented, providing a large and helpful community for troubleshooting and setup guidance.
Essentials for Creating a GalliumOS Bootable USB
Before we dive into the installation process, here is what you will need:
- A USB drive (at least 4GB of storage).
- A Chromebook with developer mode enabled.
- The GalliumOS ISO file (downloaded from GalliumOS.org).
- A USB boot utility like Etcher (for creating the bootable drive).
Steps to Make GalliumOS Boot from USB
The following approach uses the Etcher tool which is available for Windows, macOS, and Linux. Here are the steps:
1. Enable Developer Mode on Your Chromebook
Before you can install GalliumOS, you need to enable Developer Mode on your Chromebook. This will allow you to install and run a different operating system. Here's how to enable Developer Mode:
- Turn off your Chromebook.
- Hold down the ESC key and the Refresh key, then press the Power button.
- Release the keys once the recovery screen appears.
- Press Ctrl + D to enable Developer Mode and follow the on-screen instructions.
Note: Enabling Developer Mode will wipe your local data, so make sure to back up anything important first.
2. Download GalliumOS
Go to the GalliumOS download section and get the appropriate ISO file for your Chromebook or Chromebox.
3. Create a Bootable USB Drive
Now that you have the GalliumOS ISO file, it's time to create a bootable USB drive:
- Download and install Etcher (available for Windows, macOS, and Linux).
- Open Etcher and select the ISO file you downloaded.
- Insert your USB drive into your computer and select it in Etcher.
- Click Flash! to create the bootable USB drive.
4. Boot from USB on Your Chromebook
Once your USB drive is ready, you can boot GalliumOS from it:
- Insert the bootable USB drive into your Chromebook.
- Turn on your Chromebook and press Ctrl + L at the boot screen to enter the legacy boot mode.
- Select the USB drive as the boot device and hit Enter.
If everything went smoothly, your Chromebook should now boot from the prepared USB drive!
Alternate Method: Make a GalliumOS USB via DD
For users comfortable with the command line, you can use the Linux dd command line utility to create a bootable USB. This method is powerful but requires caution, as use of dd will overwrite data.
- Insert your USB drive into your computer and note its device name. You can identify it by running:
lsblkLook for your USB drive in the output (e.g., /dev/sdX, where X represents the device letter).
- Navigate to the directory where the GalliumOS ISO is saved. For example:
cd ~/Downloads - Use the dd command to write the ISO to the USB drive. Replace sdX with the actual device name of your USB (e.g., /dev/sdb):
sudo dd if=GalliumOS.iso of=/dev/sdX bs=4M status=progressif=specifies the input file (the GalliumOS ISO).of=specifies the output device (your USB drive).bs=4Msets the block size to 4MB for faster transfer.status=progressshows the write progress. - Wait until the process is complete. Once done, safely eject the USB drive by running:
sudo eject /dev/sdX
Warning: Double check the device name of your USB drive before using dd, as it will overwrite the specified device completely.
Running Linux on Chromebook: FAQ
Can I install Linux on my Chromebook?
It depends on the Chromebook model, processor architecture, firmware, and support status. GalliumOS development has been discontinued, and its old kernel lacks important security fixes, so it is not a good default choice for a new installation. For current options, check your exact device's support and firmware requirements before changing ChromeOS or installing another Linux distribution.
How do I enable Developer Mode on a Chromebook?
Enabling Developer Mode is required to install a Linux OS. Here's how:
- Power off your Chromebook.
- Press and hold ESC + Refresh, then press the Power button.
- When the recovery screen appears, press Ctrl + D.
- Follow the on-screen instructions. Warning: Enabling Developer Mode will erase your data, be sure to back up first.
Will Linux run well on my Chromebook?
Yes. Lightweight distributions like GalliumOS or Xubuntu are optimized for Chromebook hardware and typically offer smooth, efficient performance even on low-end models.
Can I run Linux alongside ChromeOS?
Sometimes, but dual-booting is not supported on every Chromebook and may require model-specific firmware changes or tools. Check the exact device's compatibility and current installation instructions first. Back up your data; enabling Developer Mode erases local data, and changing firmware can carry additional risks.
What should I do if my Chromebook doesn't recognize my USB drive?
Ensure Developer Mode is enabled and the USB is properly formatted and bootable. Press Ctrl + L at startup to access the legacy boot menu. If the USB still isn't detected, double-check the bootable configuration using tools like Rufus or Etcher.
Can I install Linux on a Chromebook without using Developer Mode?
On supported Chromebooks, Google's built-in Linux development environment (Crostini) usually lets you run Linux apps and command-line tools without enabling Developer Mode. Crouton is a different, older approach that generally requires Developer Mode and is not the same as installing a supported standalone Linux distribution. Check Google's current support information for your device.
Will installing Linux erase my ChromeOS data?
Enabling Developer Mode will wipe all local data. Always back up your files first. Once Linux is installed, ChromeOS and Linux can coexist without additional data loss.
Can I revert back to ChromeOS if I don't like Linux?
Yes. You can reset your Chromebook via a Powerwash (factory reset), which will remove Linux and restore the default ChromeOS environment. ChromeOS can also be reinstalled manually if needed.
What software can I run on Linux for Chromebook?
Linux gives you access to a wide range of software, including:
- Web browsers like Firefox and Chromium
- Office tools like LibreOffice
- Media players like VLC and GIMP
- Development tools like VSCode, PyCharm
- Package managers such as apt (Debian/Ubuntu-based) and Snap
Do I need an external keyboard and mouse for Linux on my Chromebook?
Not usually. Most Chromebook keyboards and trackpads work out of the box with Linux. If compatibility issues arise, you can connect external input devices or install additional drivers.
Final Take on GalliumOS
GalliumOS is now a legacy option rather than a recommended modern solution for Chromebook users looking to move away from ChromeOS or use it alongside and experience the full power of Linux. Because its software and kernel are outdated, it may lack current security fixes and support for newer Chromebook hardware. Use it only after researching your specific device and understanding the risks. By following the simple steps outlined above, you can easily make GalliumOS boot from USB and start enjoying a Linux environment that was specifically tailored for those using Chromebooks and Chromeboxes.
If you're looking for a new alternative Linux operating system for your Chromebook, this is definitely the distro to use. Have you tried GalliumOS on your Chromebook? Let me know how it worked for you or if you have any questions!