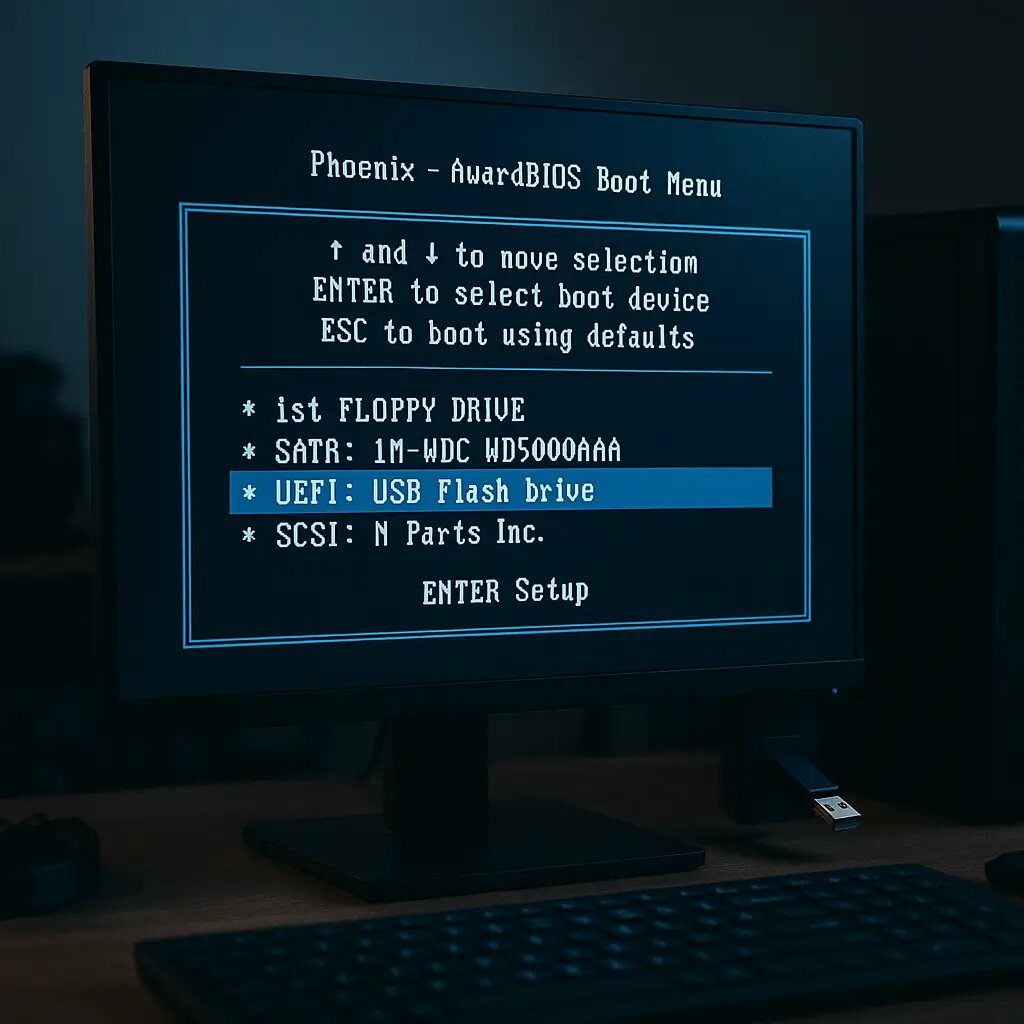
How to use the USB Boot Manager to Boot from USB on computer system with a Phoenix Award BIOS; Booting from a USB flash drive lets you run or install an operating system, perform system recovery, or launch a live Linux environment—all without using your internal hard drive. This guide walks you through accessing the Boot Menu on a Phoenix Award BIOS and setting a USB flash drive as the primary boot device.

Demonstration system: MSI K8N Neo4 (MS-7125) motherboard. This board supports booting from any properly configured bootable USB flash drive or external hard disk.
How to Access the Boot Menu and Boot from USB on a Phoenix/Award BIOS
Follow these step-by-step instructions to set your USB flash drive as the first boot device using a Phoenix or Award BIOS:
- Insert the USB Drive: Plug your bootable USB flash drive into an available USB port.
- Reboot the Computer: Restart your system. During POST (Power-On Self-Test), begin tapping the F11 key—or the appropriate key for your motherboard—to enter the Boot Menu.
- Access the Boot Menu: If F11 doesn't work, try F2, F10, ESC, or Delete, depending on your motherboard. You can find a list of common BIOS/boot keys here.
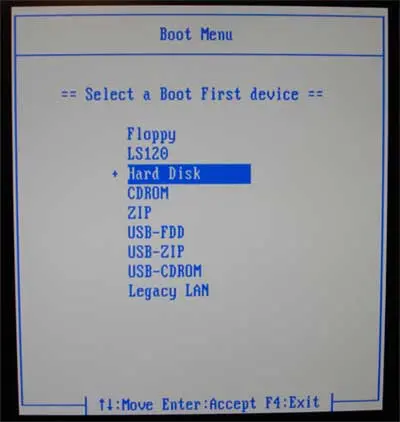
- Select Hard Disk as Boot Type: Use the arrow keys to highlight the Hard Disk option and press Enter.

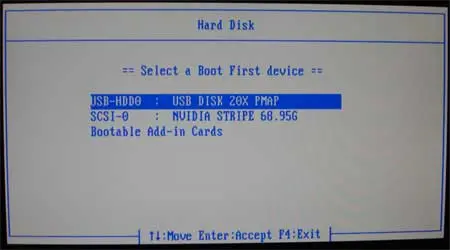
- Select Your USB Drive: From the list of detected hard disks, use the arrow keys to highlight your USB device and press Enter.
Note: If your USB isn’t listed, ensure it’s properly formatted and marked as bootable. Use GParted (Linux) or diskpart (Windows) to set the partition as active.

- Save and Reboot: F4: Exit the BIOS or boot menu and reboot your system. If configured correctly, the system should now boot from the USB flash drive.
What to Do After Booting from USB
Once the system boots from your USB drive, you can launch a Linux distribution, install an operating system, or use system repair and diagnostic tools—depending on what your USB was configured for.
Formatting and Bootable USB Creation Tips
Make sure your USB drive uses a compatible file system like FAT32 or exFAT. To create a bootable USB, use trusted tools such as:
YUMI is especially useful for multiboot setups that allow you to store multiple OS installs or utilities on a single flash drive.
Frequently Asked Questions (FAQ)
How do I access the Boot Menu on a Phoenix or Award BIOS?
During startup, press the F11 key repeatedly as the system begins POST. If that doesn’t work, try F2, F10, ESC, or Delete. The exact key depends on your motherboard manufacturer.
Why isn’t my USB drive showing in the Boot Menu?
If your USB flash drive doesn’t appear in the boot menu, make sure it’s properly formatted (FAT32 or exFAT), marked as active, and fully bootable. You can set the boot flag using tools like GParted or diskpart.
What does 'Hard Disk' option mean in the Boot Menu?
Some Phoenix/Award BIOS menus list USB flash drives under the Hard Disk section. Select that option first, then choose the USB device from the expanded list.
Which USB tools are best for creating bootable drives?
Popular options include YUMI, Universal USB Installer, Rufus, and Etcher. YUMI is great for multiboot setups with multiple OS installs.
Conclusion on using the USB boot Manager to Boot from USB
With the right BIOS settings and a properly prepared USB flash drive, booting from USB using the USB boot manager on a Phoenix Award BIOS is straightforward. Use this guide to configure your system and troubleshoot any USB boot issues that arise.
