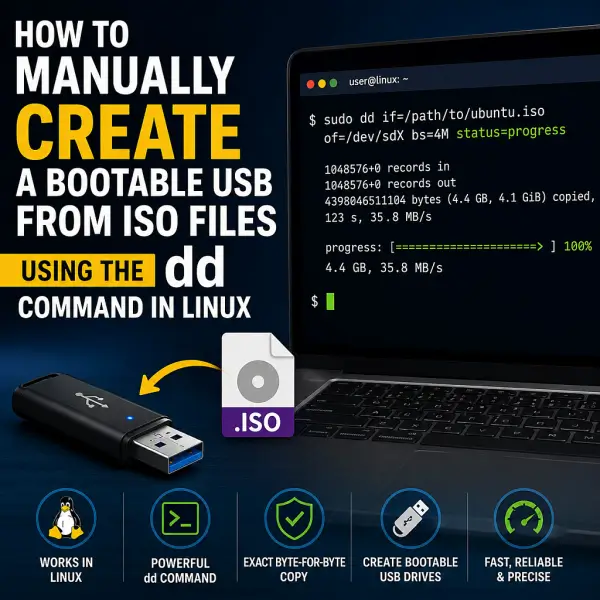
Learn how to create a bootable USB from an ISO file using the Linux `dd` command. `dd` writes the image directly to the USB device, which makes it useful for Linux distributions, recovery tools, and other hybrid ISO images designed to boot from USB. The examples below use GNU/Linux syntax; macOS has different device names and command options.
How to Write an ISO to USB Using Linux dd
Quick Answer
To create a bootable USB from an ISO file using Linux, first back up the USB drive, identify the correct device with `lsblk`, and unmount all mounted partitions on it. **The command below overwrites the target device and destroys its existing data. Verify the device name carefully before running it.**
sudo dd if=/path/to/file.iso of=/dev/sdX bs=4M status=progress conv=fsync
Replace `/dev/sdX` with your whole USB device (not a partition such as `/dev/sdX1`) and replace the input path with your ISO file. Wait for the command to finish before ejecting the drive. This method works with ISO images designed to be written directly to USB; not every ISO supports this method.
The Linux dd command can be used to write ISO to USB, resulting in a bootable USB drive. The dd command is an extremely powerful Linux utility, often nicknamed the "disk destroyer, " "disk duplicator, " or "data dump" tool due to its ability to interact directly with block devices.
Important Warning Before Proceeding
dd command is powerful and can permanently erase data if used incorrectly.Always double-check your
if= (input) and of= (output) parameters before execution.You cannot recover overwritten data!
Common DD Command Examples
| Task | Command |
|---|---|
| Create a bootable USB | sudo dd if=/path/to/filename.iso of=/dev/sdX bs=4M status=progress |
| Clone a disk | sudo dd if=/dev/sdX of=/dev/sdY bs=4M status=progress |
| Create a disk backup | sudo dd if=/dev/sdX of=backup.img bs=4M status=progress |
| Restore a backup | sudo dd if=backup.img of=/dev/sdX bs=4M status=progress |
| Erase a drive | Use a suitable disk-management or secure-erase tool; do not treat a single dd overwrite as a guaranteed secure erase for flash storage. |
What does DD stand for in Linux?
The dd command takes its name from IBM's Job Control Language (JCL), where "DD" stood for "Data Definition." It was introduced in UNIX for low-level data copying and conversion. While some users refer to it as "Data Dump" due to its functionality, this is not its original meaning.
Unlike traditional file copying commands like cp, dd operates at a low level and can work directly with block devices such as hard drives, SSDs, USB drives, and disk images. This makes it useful for disk imaging, backup creation, and data conversion tasks. However, because dd can overwrite data without warning, it has earned the nickname "disk destroyer."
In essence, dd is a powerful and precise tool for low level data operations, making it invaluable for system administrators and advanced users.
Why use DD to create a bootable USB from ISO?
Here are some of the benefits and reasons why dd is commonly used for creating bootable USB drives directly from ISO files:
- Direct Data Copy: dd performs a low level block by block copy, ensuring that the ISO image is written exactly as stored on disk.
- No Need for File System Creation: Unlike some other methods, dd doesn't require formatting or creating a file system on the USB drive. It writes the ISO image directly to the device, preserving the bootable structure.
- Simplicity and Precision: The command is straightforward, with a simple syntax that directly addresses the source (ISO) and destination (USB drive). This precision reduces the risk of errors compared to more complex tools.
- Versatility: Can be used for a wide range of tasks beyond creating bootable USB drives, such as disk imaging, cloning partitions, and creating backups.
- Works with Various ISO Formats: Handles bootable ISO file formats, including those used for operating systems, utilities, and other bootable media.
- Progress Monitoring: With the
status=progressoption, dd can provide real-time updates on the copying process, helping you track its progress. - Compatibility: Is available on most Unix-like systems (Linux, macOS, etc.) and is often included in the default installation. This widespread availability makes it a reliable choice.
Alternative DD Command for Safer Use
Another option is dcfldd, an enhanced version of dd with features such as progress reporting and hashing. It is not a substitute for checking the source and destination device names carefully.
sudo apt install dcfldd
Then use:
sudo dcfldd if=/path/to/filename.iso of=/dev/sdX bs=4M
Graphical Alternative Methods
If you'd rather use a tool with a graphical interface to simplify the process, consider the following:
- Balena Etcher: A cross platform USB and SD card imaging tool that automates the process and minimizes the risk of errors. It's available for Linux, macOS, and Windows.
- Win32 Disk Imager: A Windows tool for writing compatible raw IMG disk images to USB drives and SD cards. For most Linux ISO files, use a tool that specifically supports bootable ISO images, such as Rufus or balenaEtcher.
Both of those tools can help reduce the chances of accidentally overwriting the wrong drive through visual selection, and are ideal for users who prefer not to use the terminal.
Linux DD Command FAQs
Here are some commonly asked questions regarding the Linux dd command.
What does "dd" stand for in Linux?
The name dd comes from IBM's Job Control Language (JCL), where "DD" stood for "Data Definition." In UNIX, it's used for low-level data copying. Some call it "Disk Destroyer" or "Data Duplicator" based on its powerful behavior.
How do I create a bootable USB from an ISO using dd?
First identify your USB device using lsblk, unmount any mounted partitions, and then run:
sudo dd if=/path/to/file.iso of=/dev/sdX bs=4M status=progress oflag=syncReplace /dev/sdX with your USB device. Once the process completes, safely eject the drive and boot from it.
What is the purpose of the block size (bs) option in dd?
bs=4M means 4 megabytes will be copied at once. Setting an appropriate block size can greatly improve performance during data transfer.
Is it possible to recover data overwritten by dd?
Generally, no. Once dd writes over data, recovery is nearly impossible. Always double-check the output device.
How can I cancel dd if it's taking too long?
Press Ctrl + C in the terminal. Keep in mind the device may be left in a corrupted or incomplete state.
Does dd work with NTFS formatted USB drives?
Yes. dd works at the raw level, ignoring file systems. The USB will inherit the file system of the ISO image written to it.
How can I monitor dd progress while it is running?
Use status=progress in the command, or in another terminal run:
kill -USR1 $(pgrep -x dd)
Can I use dd to clone drives?
Yes. For example:
dd if=/dev/sdX of=/dev/sdY bs=4M
This completely clones one drive to another, overwriting the destination.
What is the safest way to use dd to create a backup?
Use:
dd if=/dev/sdX of=/path/to/backup.img bs=4M status=progress
To restore:
dd if=/path/to/backup.img of=/dev/sdX bs=4M status=progress
Can dd securely erase a USB flash drive?
Do not rely on a normal dd overwrite to securely erase flash storage. Wear-leveling and spare cells can leave data outside the areas addressed by a normal overwrite. Use a suitable manufacturer-supported secure-erase method where available, or follow a data-destruction process appropriate for the sensitivity of the data.
Are there any risks in using dd?
Absolutely. dd can wipe your system if misused. Always verify your input/output targets before running the command.
Why is my USB drive showing the wrong size after using dd?
Writing an ISO can replace the USB drive's partition layout, so the operating system may show only the image's partitions or report an unexpected capacity. If you want to reuse the drive for storage, use GNOME Disks or GParted to recreate its partition table and format a new partition. Do not run wipefs or other disk-erasure commands unless you have confirmed the target device and understand that the operation changes disk metadata.
How do I restore my USB drive to normal after using dd?
Writing an ISO can replace the USB drive's partition layout. To reuse it for ordinary file storage, open a disk-management tool such as GNOME Disks or GParted, select the correct USB drive, create a new partition table if needed, then create and format a new partition. This erases data, so verify the selected drive and back up anything important first.
Can I use dd on Windows?
Not natively. Windows users can install a port like dd for Windows via Cygwin, or use tools like Etcher, Rufus, or Win32 Disk Imager.
Important Notes Before Burning an ISO to USB
Before executing the dd command, it's crucial to be aware of the following to avoid errors and ensure a successful process:
- Backup Important Data: The dd command will overwrite everything on the target USB drive. Ensure any important data on the drive is backed up beforehand.
- Unmount USB Drives: Make sure the USB drive is not mounted before running dd. Use the
umountcommand to unmount it:sudo umount /dev/sdX1
- Double-Check Device Names: Identify the correct device name (
/dev/sdX) to avoid overwriting the wrong drive. Use commands likelsblkorfdisk -lto confirm the device path. - Verify ISO Integrity: Use
sha256sumto confirm the ISO file is not corrupted before proceeding:sha256sum /path/to/filename.iso
Compare the checksum result with the ISO provider's official hash value.
- Double-Check Commands: Always double-check the input file (
if=) and output file (of=) paths in the dd command to prevent accidental data loss.
How to Burn a Bootable ISO to USB using DD
Here are the steps necessary to use dd to copy or burn a bootable ISO to USB and a breakdown of how it works:
- Identify the USB Drive: Insert your USB drive and then identify its device name using the
lsblkorfdisk -lcommand. For example, your drive's device name might be/dev/sdX(whereXrepresents a letter like b, c, d, etc.).sudo lsblk
sudo fdisk -l
- Unmount the USB Drive: Unmount the USB drive if it is mounted. Replace
/dev/sdX1with the appropriate partition signified by 1, 2, etc.sudo umount /dev/sdX1
- Copy an ISO to the USB Drive: Use the dd command to copy an ISO file to the USB drive. Make sure you change
/dev/sdXto your device name and set/path/to/filename.isoto your actual path and ISO filename. Use caution before proceeding with this step, as it will overwrite all data on the drive.sudo dd if=/path/to/filename.iso of=/dev/sdX bs=4M status=progress oflag=sync
- if=/path/to/filename.iso specifies the input file (ISO).
- of=/dev/sdX specifies the output file (USB drive).
- bs=4M sets the block size to 4 megabytes.
- status=progress shows progress.
- oflag=sync ensures synchronous writes.
- Wait for the Process to Complete: The process may take time depending on the ISO size and USB speed.
- Safely Eject the USB Drive: Once complete, eject the USB drive to prevent data corruption.
sudo eject /dev/sdX
How to Verify a Bootable USB After Creation
After using dd, it's important to verify that your USB drive is bootable and that the ISO file was correctly written. Here's how:
- Inspect the USB Drive: Use the
filecommand to check the USB drive's data structure:sudo file -s /dev/sdX
Replace
/dev/sdXwith your USB device path. - Boot Testing: Re-insert the USB into your system and boot from it. Ensure your system's BIOS or UEFI is set to prioritize USB boot.
Troubleshooting DD Command Issues
Facing issues while burning an ISO to USB using dd? Here are common problems and solutions:
- USB Drive Not Booting: Double check the ISO's integrity with
sha256sumand compare with the official hash:sha256sum /path/to/filename.iso
Compare the result with the ISO provider's checksum to ensure it matches.
- Incorrect Device Path: Use the
lsblkorfdisk -lcommands to confirm the correct device path. - Permission Denied: Ensure you're running the command with
sudofor appropriate permissions. - Stuck Process: If dd hangs, press
Ctrl + Cto terminate it. For better visibility, use thestatus=progressoption to track progress in real time.
Final Thoughts on using DD to copy ISO to USB
The Linux `dd` command can write supported ISO images directly to a USB drive, but it requires care because an incorrect destination can overwrite another disk. Verify the ISO and device path, back up important files, and wait for all writes to finish before removing the drive. Use an appropriate tool for secure erasure rather than assuming a normal overwrite will erase all flash-storage cells.
For those who prefer graphical interfaces and multibooting, tools like UUI are great ISO to USB alternatives.