
Can you boot from an exFAT USB? Yes, but not directly from a single exFAT partition. To create an exFAT bootable USB flash drive that works in UEFI mode, you must use two partitions: one exFAT partition for storing ISO files and one small FAT32 partition dedicated to booting. A bootloader such as Grub2 is installed to the FAT32 partition, enabling boot support for both UEFI and Legacy BIOS systems.

If you have tried creating a bootable USB using exFAT and found it did not work, you are not alone. While exFAT is an excellent filesystem for large files, it cannot be used directly as a boot filesystem. Most firmware cannot boot from exFAT alone.
The solution is to format the USB drive with multiple partitions, use FAT32 for the bootloader, exFAT for storage, and configure the device with Grub2.
This guide shows how to manually create an exFAT bootable USB drive from both Windows and Linux.
How does exFAT USB booting work?
This exFAT USB boot method works on both Legacy BIOS and UEFI systems. However, UEFI firmware requires a FAT or FAT32 formatted partition that contains the bootloader and EFI binaries.
The layout we will create consists of:
- An exFAT partition used for storing ISO files and general data
- A small FAT32 BOOT partition used exclusively for Grub2 boot files
On Windows systems, only the first partition is automatically assigned a drive letter. As a result, the FAT32 BOOT partition is usually hidden. You can make it visible by manually assigning a drive letter using Disk Management.
The primary advantage of exFAT over FAT32 is file size support. exFAT allows files larger than 4GB, which is required for many modern Linux ISO images and Windows installation media. FAT32 has a strict 4GB file size limit.
Caveats:
- Legacy BIOS booting may fail on a small number of older or CSM only systems
- Secure Boot is not supported with this configuration
- Windows 7 and older DiskPart versions cannot create multiple partitions on removable USB drives
- Linux requires exFAT filesystem support and utilities to format exFAT partitions
How to Create an exFAT Bootable USB Flash Drive
Below are both Windows and Linux methods for creating an exFAT bootable USB drive.
Make a Grub2 exFAT Bootable USB Drive from Windows
Note: A batch file is available that automates this entire process. It creates a USB drive that supports drag and drop ISO loading and boots using Grub2. Download and run exfat.bat from make-exfat-bootable-usb.zip and follow the on screen instructions.
1. Creating exFAT and FAT32 partitions on the USB drive
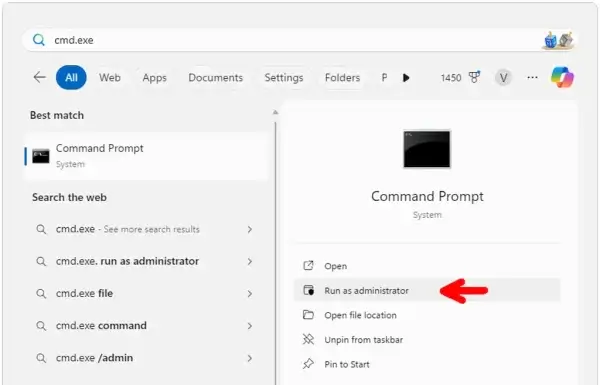
- Open a Command Prompt as administrator.
- Type cmd.exe in the Windows search box
- Select Run as administrator
- Launch Disk Management.
diskmgmt.msc
Note the disk number and drive letter for your USB device. - Start DiskPart.
diskpart - Select the USB disk.
sel disk # - Erase and initialize the disk. WARNING: This deletes all data.
cleanconvert mbr - List disks and note the size.
list diskWhy this matters: The primary partition will be shrunk by 50MB to reserve space for the FAT32 BOOT partition required for UEFI booting.
- Create the exFAT partition.
cre par prishrink minimum=50format fs=exfat label=USB quick - Create the FAT32 BOOT partition.
cre par priformat fs=fat32 label=BOOT quickassign - Verify partitions.
list parlist volIMPORTANT: Note the drive letter assigned to the BOOT partition.
- Exit DiskPart.
exit
2. Installing Grub2 for UEFI and BIOS on the USB drive
- Download the latest Grub2 build from A1ive's repository and extract it using 7 Zip. A grub folder should be placed on your Desktop.
- Change to the grub directory.
cd %UserProfile%\Desktop\grub - Install Grub2 for BIOS and UEFI.
grub-install.exe --force --no-floppy --target=i386-pc --boot-directory=X:\boot //./PHYSICALDRIVE#grub-install.exe --force --removable --no-floppy --target=x86_64-efi --boot-directory=X:\boot --efi-directory=X:\grub-install.exe --force --removable --no-floppy --target=i386-efi --boot-directory=X:\boot --efi-directory=X:\
You now have an exFAT bootable USB flash drive that boots using Grub2 on both Legacy BIOS and UEFI systems.
Make a Grub2 exFAT Bootable USB Drive from Linux
1. Partitioning the USB flash drive
- Open a terminal.
- Switch to root.
sudo su - Identify the USB device.
fdisk -l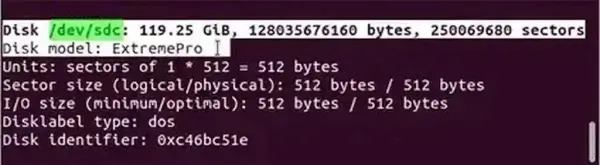
- Unmount and wipe the partition table. WARNING:
umount /dev/sdX1dd if=/dev/zero of=/dev/sdX bs=512 count=1 - Launch fdisk.
fdisk /dev/sdX - Create the exFAT partition.
- n, p, 1
- Default start sector
- -50M for size
- t, then 7
- Create the FAT32 BOOT partition.
- n, p, 2
- Accept defaults
- t, 2, then 6
- a, then 2
- w
- Format both partitions.
mkfs.exfat -n USB /dev/sdX1mkfs.vfat -F 32 -n BOOT /dev/sdX2
2. Installing Grub2 for UEFI and BIOS
- Mount the BOOT partition.
mkdir /mnt/USBmount /dev/sdX2 /mnt/USB - Download and extract Grub2.
wget https://github.com/a1ive/grub/releases/download/latest/grub2-latest.tar.gztar -xf grub2-latest.tar.gz - Install BIOS Grub.
cd grub/i386-pcgrub-install -d $PWD --force --no-floppy --target=i386-pc --boot-directory=/mnt/USB/boot /dev/sdX - Install UEFI Grub.
cd ../i386-efigrub-install -d $PWD --force --removable --no-floppy --target=i386-efi --boot-directory=/mnt/USB/boot --efi-directory=/mnt/USBcd ../x86_64-efigrub-install -d $PWD --force --removable --no-floppy --target=x86_64-efi --boot-directory=/mnt/USB/boot --efi-directory=/mnt/USB - Unmount.
umount /mnt/USBrmdir /mnt/USB
Make a Grub2 exFAT Bootable USB Drive from macOS
macOS can be used to prepare an exFAT bootable USB drive by creating the correct partitions and copying Grub2 files. However, macOS cannot run grub-install natively. To achieve full BIOS and UEFI boot support, you will need a Linux environment (live USB or VM) to complete the installation.
1. Partition and format the USB drive
- Insert your USB drive and open Terminal.
- List disks and identify your USB device:
diskutil list - Unmount the USB disk (replace X with the correct disk number):
diskutil unmountDisk /dev/diskX - Partition the USB into an exFAT partition for ISO storage and a small FAT32 BOOT partition for Grub2:
diskutil partitionDisk /dev/diskX MBR exFAT USB R FAT32 BOOT 50M
2. Download and prepare Grub2
- Download the latest Grub2 release from A1ive’s GitHub repository:
wget https://github.com/a1ive/grub/releases/download/latest/grub2-latest.tar.gz -O ~/Desktop/grub2-latest.tar.gz - Extract the archive on your Desktop:
tar -xf ~/Desktop/grub2-latest.tar.gz -C ~/Desktop/ - You now have a grub folder on your Desktop containing all BIOS and UEFI binaries.
3. Copy prebuilt EFI/Grub files to the BOOT partition (UEFI only)
- Mount the FAT32 BOOT partition:
diskutil mount /dev/diskXs2 - Copy the Grub folder to the root of the BOOT partition:
cp -R ~/Desktop/grub /Volumes/BOOT/boot - Unmount the BOOT partition:
diskutil unmount /Volumes/BOOT
At this point, your USB drive can UEFI boot using the prebuilt Grub2 files. Legacy BIOS booting will not work yet.
4. Complete Grub2 installation from Linux (for full BIOS + UEFI boot)
To enable BIOS boot support, boot into a Linux environment (live USB or VM) and run:
- Mount the FAT32 BOOT partition:
sudo mkdir /mnt/USB sudo mount /dev/sdX2 /mnt/USB - Install BIOS Grub:
cd grub/i386-pc sudo grub-install -d $PWD --force --no-floppy --target=i386-pc --boot-directory=/mnt/USB/boot /dev/sdX - Install UEFI Grub:
cd ../i386-efi sudo grub-install -d $PWD --force --removable --no-floppy --target=i386-efi --boot-directory=/mnt/USB/boot --efi-directory=/mnt/USB cd ../x86_64-efi sudo grub-install -d $PWD --force --removable --no-floppy --target=x86_64-efi --boot-directory=/mnt/USB/boot --efi-directory=/mnt/USB - Unmount and remove temporary mount:
sudo umount /mnt/USB
sudo rmdir /mnt/USB
After completing these steps, your exFAT USB drive will be fully bootable on both Legacy BIOS and UEFI systems. You can now copy ISO files to the exFAT partition for booting.
Booting ISO files from an exFAT partition
Grub includes an exFAT driver module, allowing it to read ISO files stored on an exFAT partition. However, the operating system inside the ISO must also support exFAT and automatically mount the partition during boot.
If the exFAT partition is not mounted, booting may fail and drop to a BusyBox shell.
Can I boot an ISO without native exFAT support?
- Use partnew to map the ISO as a temporary partition
- Use map --mem to load the ISO into RAM if sufficient memory is available
After mapping, configure the correct linux, initrd, or configfile paths.
An example exFAT grub.cfg is available for booting Ubuntu based ISO files. Copy it to boot/grub/ on the BOOT partition and place ISO files on the exFAT partition.
Software to automatically create an exFAT bootable USB drive
You can automatically create an exFAT bootable USB drive using YUMI Multiboot USB Creator or Universal USB Installer. Both tools support multiboot menus, drag and drop ISO loading, and persistence where supported.
You may also want to see how to make a Windows bootable USB drive that runs as a full operating system rather than a setup installer.
Frequently Asked Questions
Can UEFI boot from exFAT?
UEFI firmware cannot boot directly from an exFAT partition. A FAT32 partition containing the EFI bootloader is required. exFAT can still be used for storing ISO files when paired with a separate FAT32 BOOT partition.
Why does exFAT not work as a boot filesystem?
Most BIOS and UEFI firmware do not include native exFAT drivers. Because of this, firmware cannot locate boot files on an exFAT-only partition. Bootloaders such as Grub2 must be placed on a FAT32 partition instead.
Is exFAT better than FAT32 for bootable USB drives?
exFAT is better for storage because it supports files larger than 4GB. FAT32 is still required for booting due to firmware limitations. Using both together provides maximum compatibility.
Can I boot Linux ISO files from an exFAT USB?
Yes. Linux ISO files can be booted using Grub2 if the distribution includes exFAT support or if the ISO is mapped using loopback, partnew, or map --mem.
Does Secure Boot work with exFAT bootable USB drives?
No. Secure Boot is not supported with this manual Grub2 exFAT setup. Secure Boot requires signed EFI binaries and a different boot configuration.
What is the easiest way to create an exFAT bootable USB?
The easiest method is to use automated tools such as YUMI Multiboot USB Creator or Universal USB Installer, which handle partitioning and bootloader installation automatically.
Final Thoughts
exFAT is an excellent filesystem for bootable USB storage, but firmware limitations prevent it from being used as a standalone boot filesystem. By pairing exFAT with a small FAT32 BOOT partition and using Grub2, you gain the ability to boot both UEFI and Legacy BIOS systems while retaining support for large ISO files.
This dual-partition approach is ideal for multiboot USB drives, diagnostic tools, and modern Linux distributions that exceed the FAT32 file size limit. If you prefer not to configure everything manually, automated tools can create the same layout with minimal effort.
Used correctly, an exFAT bootable USB offers the best balance of compatibility, flexibility, and performance for modern boot-from-USB workflows.