Knoppix Persistent USB; Once you have successfully booted from your Knoppix USB flash drive, you might find that there are changes you would like to make and settings you need to adjust. After getting everything the way you want it, you will need to save your changed settings back to the stick and have them automatically applied at boot. The following instructions illustrate how to save your changes to the USB drive and then restore those saved changes (have them persist) upon subsequent reboots.
Note that this tutorial was originally written in 2006, and will not work on the most recent versions. I'll revisit at a later time to update the process.
Creating a Knoppix Persistent home directory
How to Create a USB Knoppix Persistent Overlay Image.
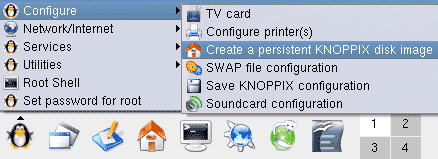
- Click the penguin located in the panel at the bottom of your screen. From the Menu, select Configure-> Create a persistent Knoppix disk image

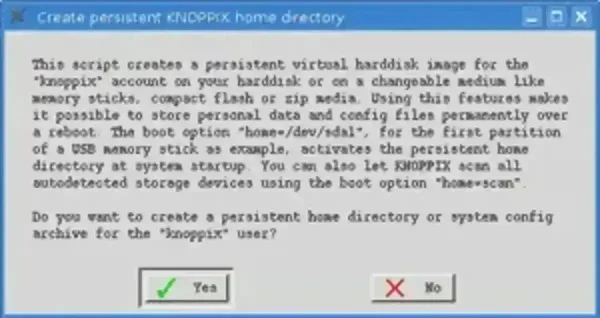
- Click Yes in the box that pops up to proceed!

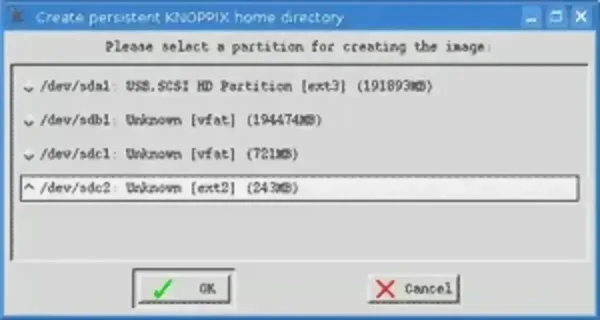
- Choose the partition that corresponds to your "USB flash drive". For example /dev/sdc2

- You will be asked if you want to encrypt the file that will be created on the flash drive. This is optional, so you may click No.
- Enter the size in megabytes you would like your home directory to be. For example, enter "200" for 200 MB. Click OK.
- Wait while the system prepares the flash drive. If the drive has an activity light, you will see it flashing. Wait for the setup process to complete.
- The system will now inform you of what to type at the boot prompt to use the persistent Knoppix home directory on your flash drive. It should automatically find the persistent image at boot, but, make a note of what it says, then click OK.
- You must reboot for the change to take effect. Shut down and restart your computer.
- On reboot a Knoppix configuration menu should pop up stating that it has found a home directory on your device.
- Select OK and the USB flash thumb drive will now be used for the home directory of the Knoppix user.
Now you can optionally recall your stored settings from the USB and merge those saved settings during boot.
Notes: You will need to make your selection in step 10 quickly or the system will boot without using the Knoppix persistent overlay image.
